How to use Google Takeout Transfer to migrate Data to another Google Account
There are two methods for getting a copy of the data in your school-issued Google account
Google Takeout Transfer
This method allows you to transfer all of your email and Google Drive files to another account.
This will only work if you have a Google account (@gmail.com) or an account from another Google Workspace domain, such as a university that uses Google Workspace.
Google Takeout Download
You would use this method if you are not transferring your data into another Google account.
You would use this method if you are trying to download more data than what is offered by the Transfer feature (Google Photos, Chrome data, Google Keep notes, etc.
How to use Google Takeout Transfer to migrate your Data to another Google Account
Make sure the destination account you’re transferring into is a Google Account account (@gmail.com)
On your CDS (@calvarydayschool.com) Google Account visit The Google Takeout Transfer Tool by going to this link:
https://takeout.google.com/transfer and follow the instructions below:
When you visit, you will be prompted to enter in the email address of the destination account.
Put the email address of the destination account in here.
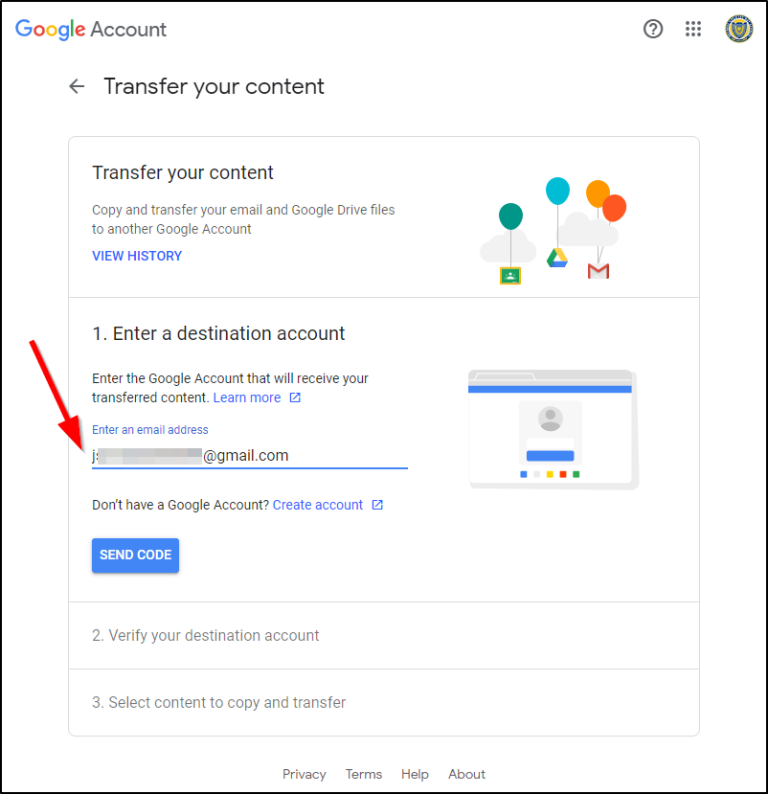
Once you click “Send Code” it will send a code to the destination gmail address you’ve typed in
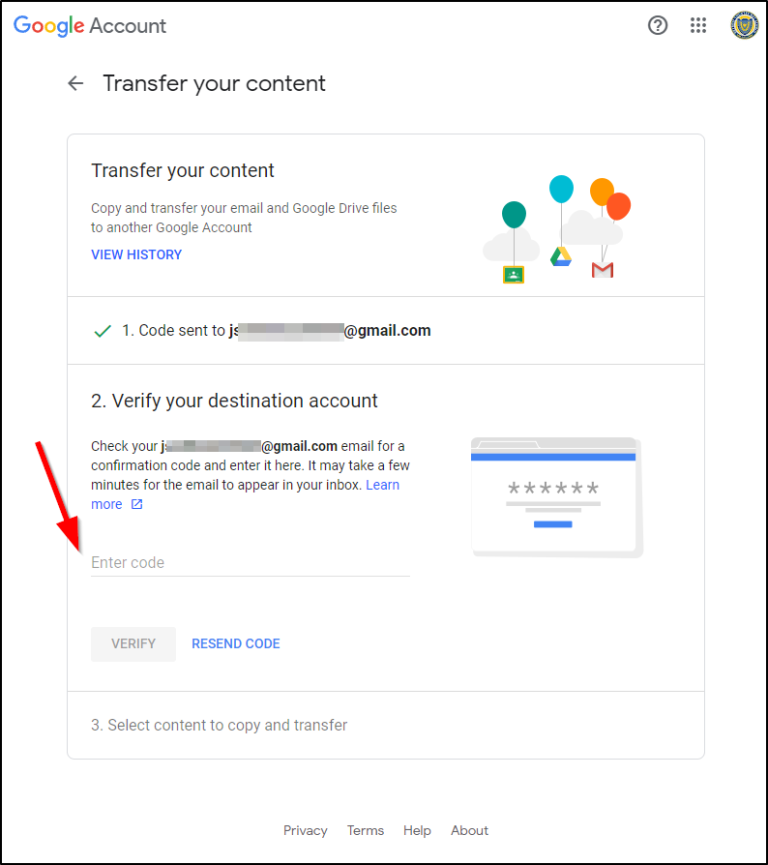
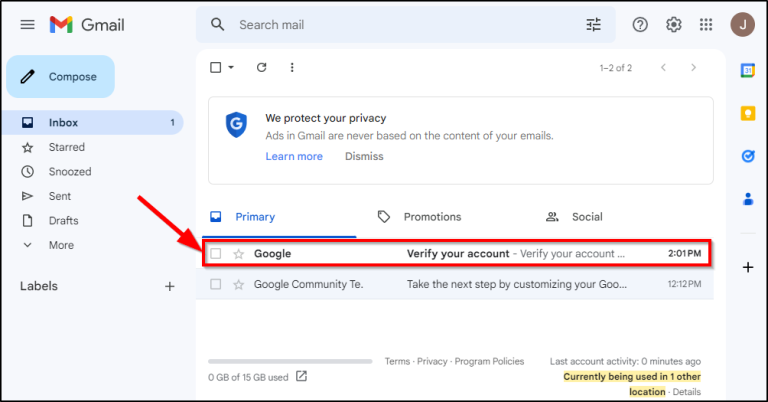
Now, go to your destination email account and check the email. You should see a new email from Google that asks you to “Verify your account”
Select the button that says “Get Confirmation code”
Now, click “Start Transfer”
How to use Google Takeout to Download your Data to your Computer
On your CDS (@calvarydayschool.com) Google Account, visit Google Takeout
Go to this link:: https://takeout.google.com/ and follow the instructions below:
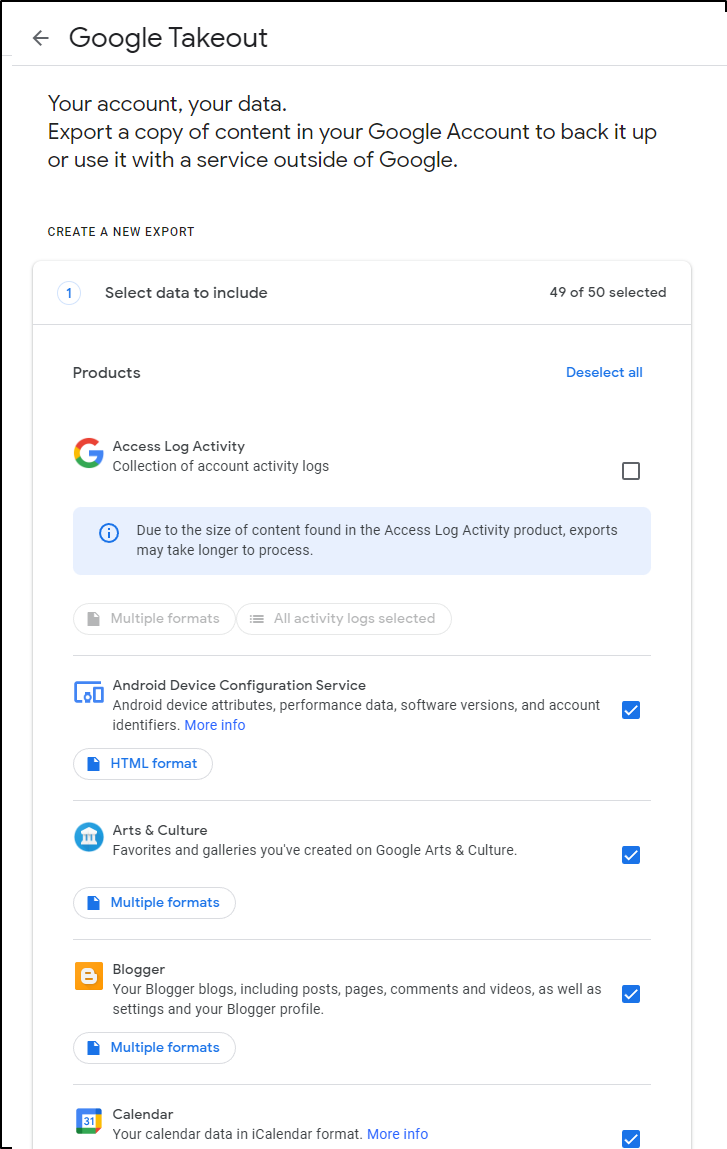
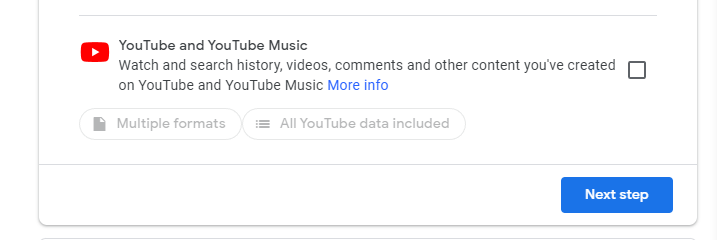
You’ll notice a very long list of services available for you to download.
We recommend only downloading data from services that are important to you, as this will decrease the amount of time it takes to create the backup.
- Calendar
- Chrome
- Drive
- Photos (if you have uploaded anything there)
- Keep
- Mail
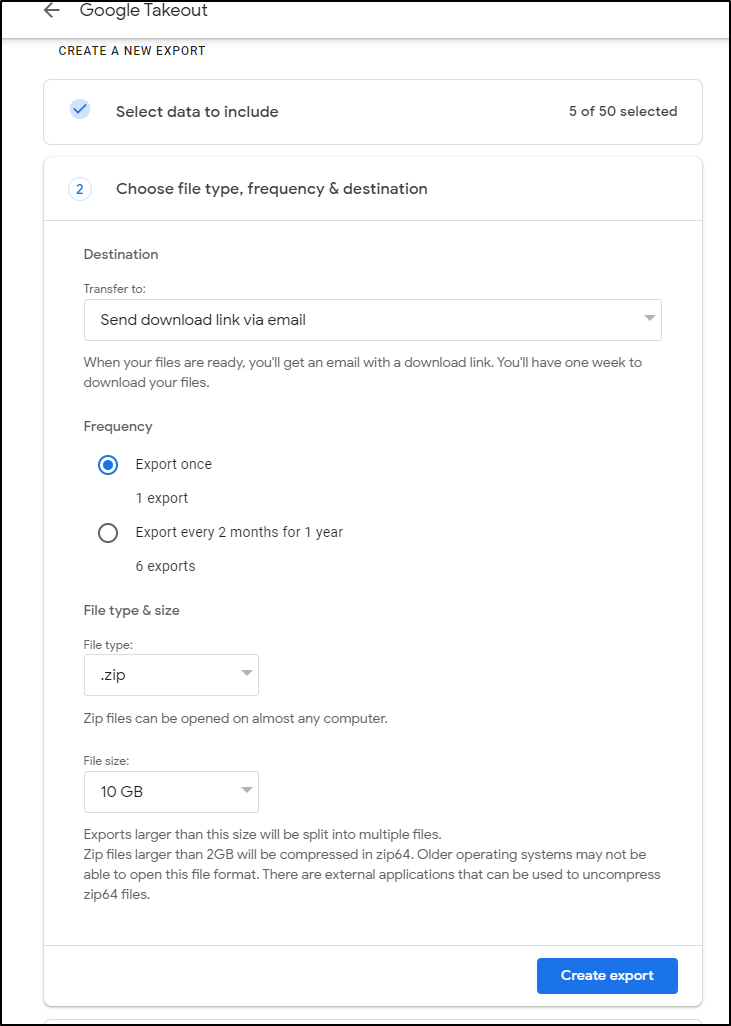
We recommend the following options:
Transfer to: Send download link via email
Frequency: Export Once
File Type: .zip
File Size: 5GB or 10GB
Now select “Create Export”
You will now see your “Export Progress” page
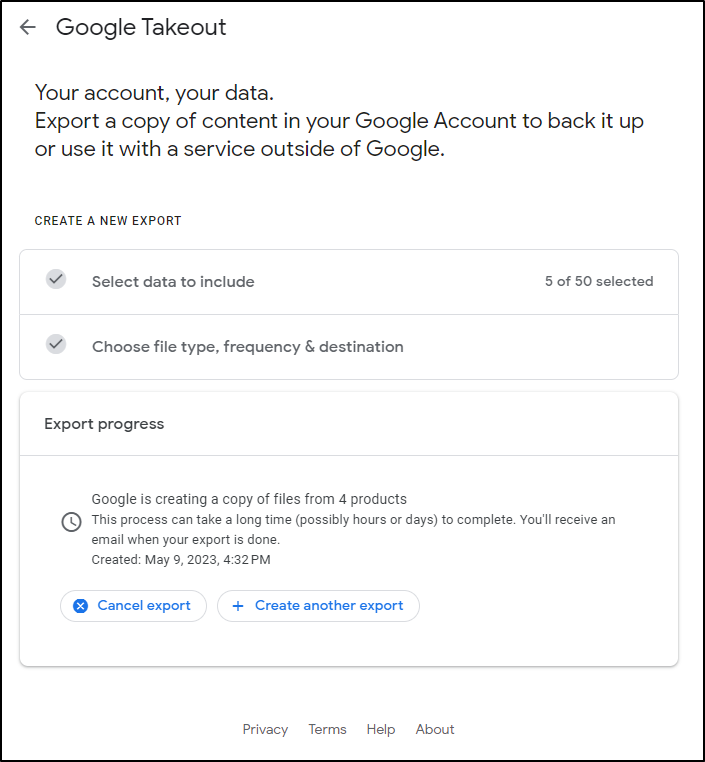
This part can take hours, or even days to finish, depending on the amount of data you’re trying to archive. From personal experience, less than 10GB takes under 10 hours. More than that might take days.
After waiting, you will eventually get an email that looks like this, sent to your CDS account.
The email itself will look like this
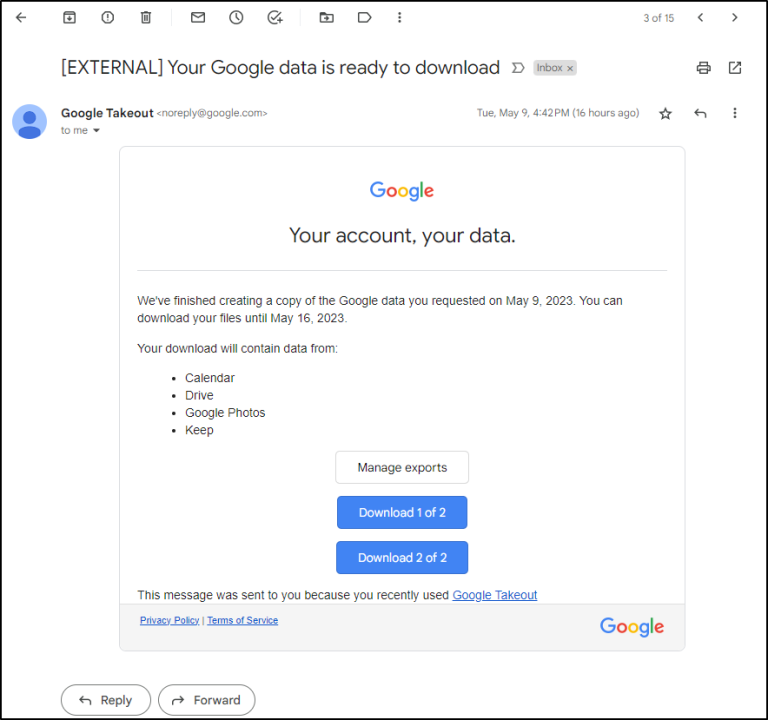
At this point, you can either download the archives using the links in the email or click on “Manage Exports” to be taken back to Google Takeout and download them directly
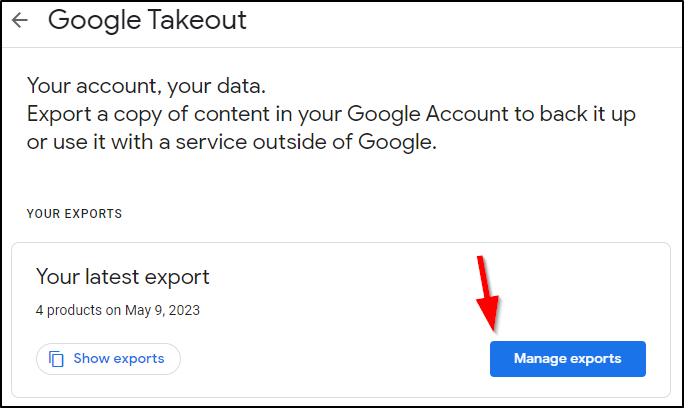
Note that there is an expiration date on when you can download this data. We see in the example here my export will no longer be downloadable after May 16 2023, at which point I would have to restart the Google Takeout process all over again. Be sure to download your data quickly so that you do not have to repeat the process!
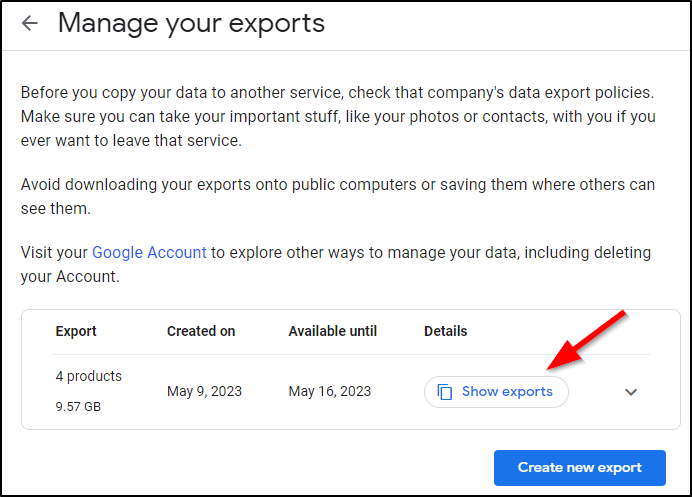
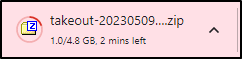
You will get a pop-up that shows you the different .ZIP files that your Google Takeout export has been separated into. The size of each .ZIP was determined by the size you set earlier. For our example earlier, I chose “5GB”
We highly recommend downloading each .ZIP of your archive individually and waiting until it has finished downloading before downloading the next one; do not attempt to download all of them at once, as this can slow the process down. Additionally, if you experience a network interruption, it will likely stop the download for all of them, or result in a partial download of data that has to be restarted.

The .zip files will have the name “takeout” + the date of the archive. Once you have downloaded all of the parts of your export you should be all set!